This version is the detailed text-and-images version; if you'd like the simplified version (everything is a giant image!) check it out at my DeviantArt, here.
The Tutorial
Supplies: The following are the supplies you'll need in order to begin needlefelting. The most important advice I can give you here is NOT to buy from anywhere that does not specialize specifically in wool and felting. Generic craft stores are not going to have the quality or variety you need for a reasonable felt, and they'll be charging insane prices on top of that. You can find most of the supplies you need at specialty stores near you (if you're lucky), or online - either on Etsy or at a specialized online felting retailer (my personal favourite is Living Felt. Some stores also offer starter kits which include most basic supplies (although they may not always contain the colours of wool you want).
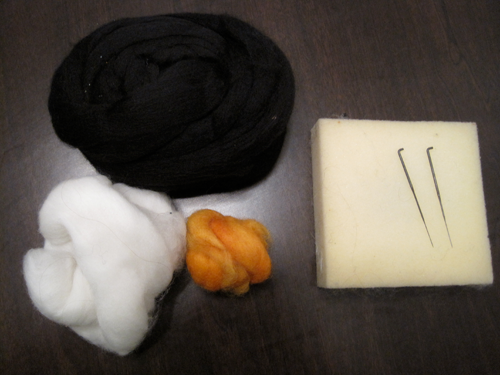
Wool: Every project you do will require you to have specific wool, in regards to both colour and amount. When you get started, it can be a little daunting - there are a large variety of different types. My personal favourite is Merino top, but a fine Corriedale will work as well - Corriedale is just not quite as fine a wool. Generally there isn't a huge price difference, but you might be able to find the colours you need in one but not the other. For this particular project, you'll need both white and black wool (I tend to buy them in large quantities, as it's cheaper and they're very commonly used), as well as a small amount of orange. I suggest buying the black and white in large individual quantities, but the orange you can either buy individually or in a multi-colour pack. Multi-colour packs tend to be slightly less expensive then buying all the colours individually, and may have the colours you want in smaller amounts than you'd be able to buy otherwise.
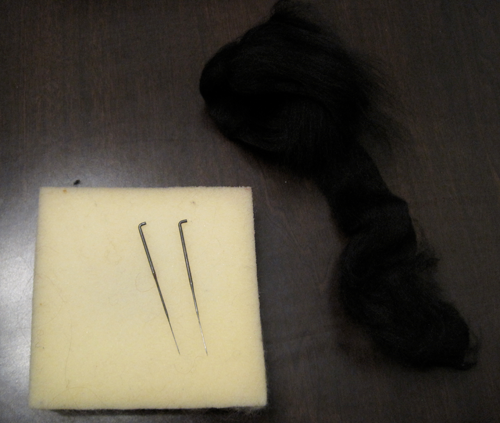
Needles: Felting needles are nothing like needles you'll use for other projects. These are made specifically for stabbing wool, and tiny indents and barbs in the needle will pull the fibres of the wool together, "felting" it into a solid piece. There are a variety of different shapes and gauges, but for starters I advise buying two variety sets - such as this one. You'll want two of each needle in case you break or lose one - and this is especially true when you're starting out. As you get more comfortable with specific needles, you'll know which ones you want to buy more of.
Foam: While this is not technically required, you'll have a very hard time doing any detail work without it - either as a backup to keep you from stabbing yourself/ the table, or to keep your piece clean. I use a 4x5 piece from Living Felt, especially made for needlefelting.
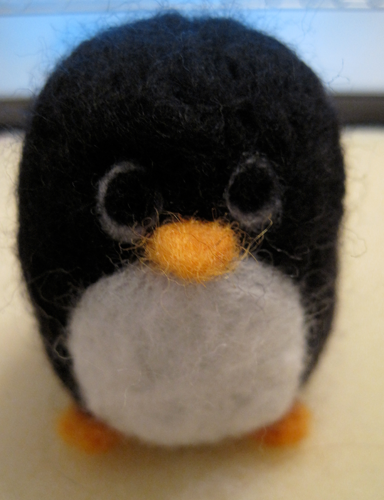
Reference Picture: Unless you're inventing a completely new, unrealistic character, this is essential. You can modify the character, certainly, but you should at the very least have this reminder of what they look like and how they're structured. This also applies if you decide to do some sort of realistic creation. Since this penguin is very stylized, I only used one image as a loose reference.

Getting Started:
Once you have your supplies, you're ready to start!
First, you'll want to pull some of your black wool out (obviously we don't want to use all of it!). The picture below shows about how much wool you'll want in comparative size (remember, the foam is 4"x5").
Next you'll want to roll that wool up into a... well, a blob. Keep in mind that this blob is quite a bit larger than your finished penguin will be - felting will be pulling all those loose fibres together, so everything will end up lots smaller than you started with. You can always add wool on top, though!
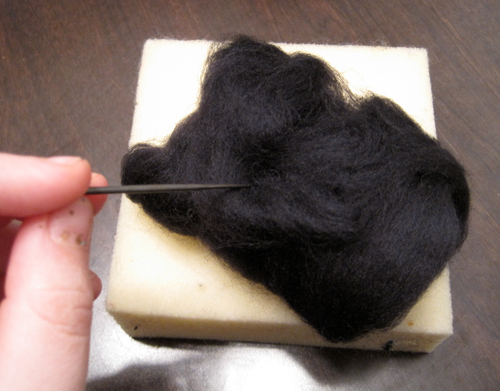
Now that it's rolled up into the proper blob, you'll start stabbing with one of the general (non-detail size) needles. And stabbing. And stabbing. (Try not to stab yourself, though!). You'll want to stab everywhere, in order to get a very rough base shape. At this point, you don't need to stab TOO much in a single area, but you do want to hit everywhere you can so it doesn't just pull apart.

Once you've got that rough base put together, it's time to start doing some serious stabbing. Your goal now is to get the actual base shape of our little penguin friend. An important thing to remember now is that you're not likely to stab TOO much. As a general rule, your needle felts will be more secure the more you stab them, keeping their shape better. Don't worry about all the little pokey pockets - they'll eventually even out.

Yay! Your base shape is complete! I know mine looks a little roughh right here, but he looks much smoother in person :) Squeeze him a bit to make sure he's pretty solid - if there's a lot of give and squish, you likely haven't stabbed it enough.
Next we'll be adding the white of his belly - here's about how much loose white wool I pulled, relative to the finished base.

I suggest using a detail needle for the top features, if you have one. You'll want to lightly poke the white into the general shape you want for his belly. You can stab more once you've gotten it evened out (colour and texture smoothness is important for a good felt!), but be careful not to pull black fibres on top of your white. You can always add some more white on top of what you've pulled if necessary, but your penguin will look better if you don't have to do that too much.

Are you starting to see it? I hope so! Next we'll be getting just a TINY bit of orange (yes, the picture is to scale).

You'll want to pinch it between your fingers, like so, and carefully poke consistently around the perimeter, rotating as necessary.

After a short while, it should look something like this:

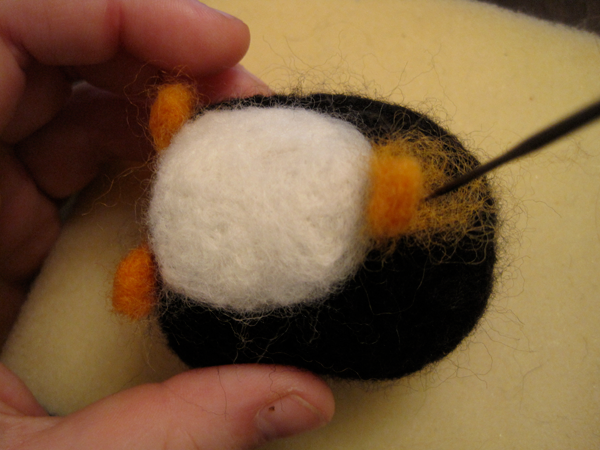
You'll then pinch it in half, and stab it until it becomes a somewhat flattened cylinder, very firm and to proper scale. You'll then take this cylinder and carefully attach it to the bottom of your Penguin's body. Sometimes doing so can flatten part of the foot more than you'd like; remember that you can always add more orange and black wool to even out the look - and that seldom will the bottom be seen ;)
And... repeat for the other foot!

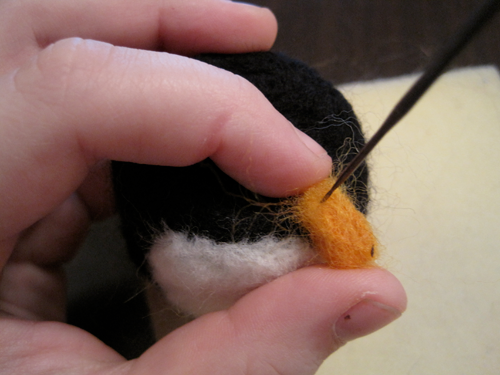
We'll be making the beak next, using a similar method to that we used for the feet. This time, though, you'll want to make a triangle. Make sure to leave extra loose wool on one side, as that'll help secure the beak in proper position.
Stab like mad! Keep going until you're sure the beak is properly secure on all sides. If it is, there'll likely be a noticeable indent in your penguin's face.
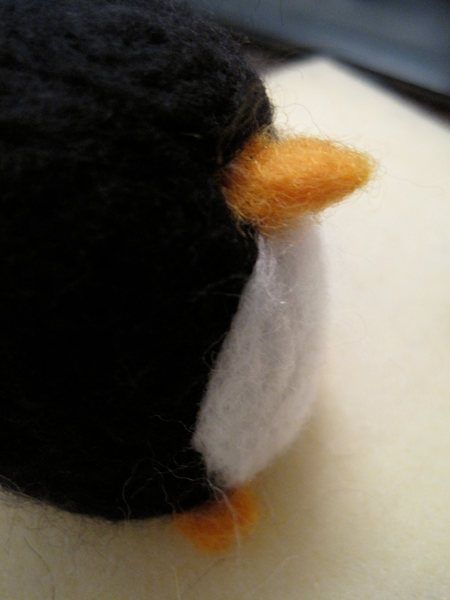
We'll fix this by adding some more black wool, which will not only make him smooth again, but also provide additional support to the beak.
Doesn't he look handsome? But something's missing...

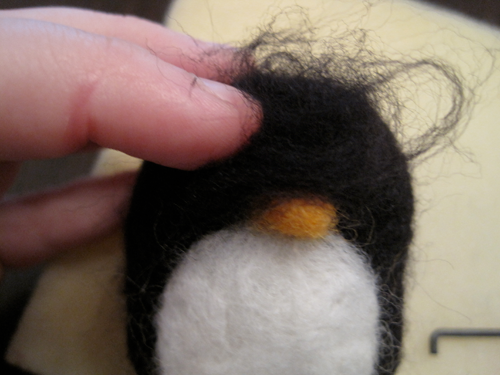
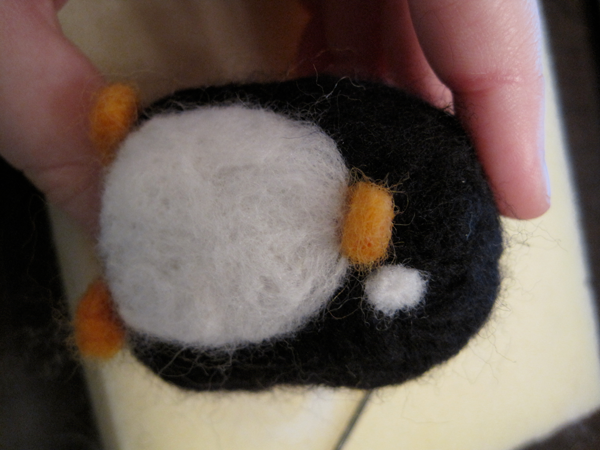
Eyes, of course! Just like you added on his belly-white (though on much smaller scale), you'll want to give him a nice white iris. Make sure to do this with the finest-point needle you have!
Using an absolutely MINISCULE amount of black, you'll next add in his pupil.
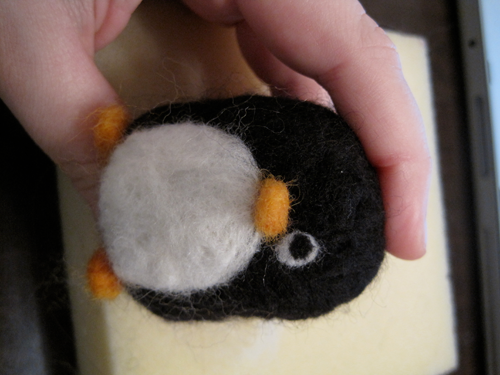
Repeat and... you're done! Make sure to give him a name, though (mine was named by my friend, who dubbed him Sven (2.0)).
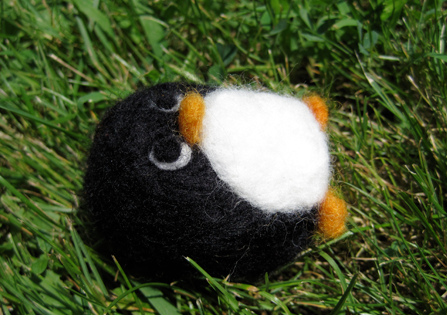
Congratulations! You've now completed your first needle-felt. Keep an eye out in the future for more advanced projects, tips and tricks... but if you absolutely cannot wait...
Further Information:
While I do hope to have more advanced guides in the future, I know that this is only one type of felting, and my style may not be what you're looking for. The following are some books I recommend if you're hoping to try out some different styles.
Little Felted Animals: This was the book I used when I started, and I found it very useful. It's great for anyone who's looking to felt realistic-looking animals, and goes in detail about some techniques I didn't cover (and some I personally don't use at all, but you might like). For some different projects and techniques, you could also check out Wool Pets.
If you're looking for more ways to use Needle Felting specifically (not limited just to animals - or even sculpting, for that matter! - check out Sweet Needle Felts.
If felting interests you beyond just needle-felting, you should definitely check out Uniquely Felt or Quick and Clever Felting. Both these books cover all sorts of different felting techniques and projects.